ETA: Sorry guys, no post today (Sunday).
Hittin' the walk in clinic to check up on this mucky lung thang; it's
acting up. And I slept in unexpectedly. (Went to bed at 6:00 last night
too. Charles just woke me up worried how I could sleep so long, lol.)
I'll catch you tomorrow, though, for some Little Paper Shop fun! :O)
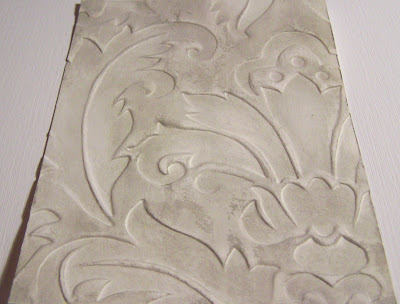
(click the pic to see the texture up close)
This one's for you Jamie! You may be sorry you asked about Gesso, heehee. ;o)
The Cuttlebug (or other embossing) technique in this tutorial ("Gesso swiped Dry Embossing") is so easy that it can hardly be called a technique (but it's so fun that i just hafta) You won't believe how fast it is (and no brushes to clean!)
So, Jamie asked What's Gesso?...
The "Short" Answer:
First off, my love gesso of gesso is ineffable. If you tried to take my gesso away forever, I would bite you.I would be all ovah you like a rabid possum! I would rather give up embellishments for life than surrender my gesso. No joke.
Gesso is an artist's primer. In other words, it's like a white chalky paint that makes a flat, or not glossy, tooth (or texture) on the surface of paper, canvas etc... Gesso is also referred to as a "ground." The flat finish it creates lets different mediums (inks, paints, etc.) stick to it. It used to made from animal glue (I believe some gesso still is) but is now primarily acrylic based (Yay for that). Many people use gesso in their art for lots of things other than priming though.
The Long ("Does Mel ever stop talking?") Answer:
The really really really exciting thing is
that gesso's acrylic-based nature changes the way inks & markers
react with your cardstocks. I've discovered in my mad experiments that
Gesso not only creates artsy texture really easily, but it also resists
inks and gives you more drying time (...hence more blending time and
embossability of S.U. markers & Classic inks. Like in colours with clear embossing powder!!!) It even offers a level of erasability for when you make a colouring mistake!Sophisticated Layered Looks: Gesso can help you create a palimpsest look--layers of stamping, images, text, collage bits, ... the options are endless. It comes in colours too, but I've only used white.
Simply adding gesso to cardstock in different ways will let you:
- Create Artsy Texture (and you can just sponge on ink for Colour).
- Emboss Stampin' Up! markers like no tomorrow.
- And create the Fastest Funkiest Faux Watercolour.
The only trick to using gesso is that some inks do not dry on it (SU inks & Tombow markers do not) but CTMH inks do, Copic do, Alcohol ink dries too of course....., so just use the drying inks (Stazon etc) or emboss it. Seems like a drawback but NOOOOoooo. It is Joy with a capital 'jump for'
Clean up: Protect your work surface & wear work clothes. Gesso is a primer so it has staying power. You'll want to clean it off stamps asap, but it comes off okay.
Applications: Use anything! You
can scrape it on with cardboard, an acrylic block, a kitchen spatula...
you can add it thickly & then stamp in it or roll a stamp wheel in
it (that is SO kewl!) Lay lace or fabric in it & pull it off... For brushing it on: different brushes will give varied textures, so it's fun to experiment. It is a good to have one brush dedicated to gesso, since it's harder on them than paint is, but you don't need any brushes for this technique...
(click the pic for an up close look at the texture)
How To Gesso Embossed Paper
(Takes just 2/3 minutes!!!):
Technique Summary:
Step 1) Start with an Embossed piece of Paper
Step 2) Use a scrap of cardboard to drag Gesso over it
Step 3) Use it as is, or ink it up.
 ->
->
Step 1) Start with an Embossed piece of Paper. You could use any paper but the embossing makes it funky. (Put it on a piece of wax paper to protect your work surface if you like. Gesso has staying power.)
This paper was embossed using that handmade embossing plate.
A Grungeboard embossing plate is another DIY option.
A Grungeboard embossing plate is another DIY option.

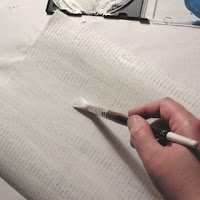
Step 2) Use a scrap of cardboard to drag Gesso over it (TIP: Quickly wipe away any globs with your finger or paper towel or whatever.) Then let it dry. It dries almost instantaneously!

Step 3) Use it as is, or ink it up. It'll have a nice texture even when it's white, but you can colour it up with a sponge or whatever. (I found rubbing with a light coloured ink lots gives a nice patina.) This is SU's Sahara Sand.
Optional:
You can sand it and add other colours too. :O)
Other Gesso stuff (that is so fun it should be illegal!)
Gesso Techniques:
(Tired of seein' this yet?)
(Tired of seein' this yet?)
Friday #6: Gesso Resist Stamping:
More Gesso Stuff ...
distressing (vintage wallpaper look or toned down colours)
& strengthening for cutting superfine detail
Gesso Brayered Scor-Pal grid
& strengthening for cutting superfine detail
Gesso Brayered Scor-Pal grid


Printing & embossing clip art on Gesso Cardstock
(Faux watercolour with CTMH markers):

& another Computer Printed example:

Embossed Printed Sentiment & Doodling
on Gesso (esp. patterned paper):

Gesso on Chipboard edges:
+Colour+edges+of+the+chipboard+%28i+painted+with+gesso%29.JPG)
+To+create+a+pocket+adhere+one+side+of+acetate+only+%28punch+it+%26+edge+with+copic+if+you+like%29.JPG)
Gesso distressed Photos (printed):

Gesso on embossed die cuts


Pencil & Copics on Gesso:


Alcohol ink & Bandanna Resist on
gesso cardstock (works on glossy cs too)
(& Gesso underpainting)


Copics on Gesso cardstock:

Thanks so much for letting me rant about gesso again Jamie! ;o)
And
Thank you all for taking time out of your busy days!
P.S. Quick reference:
How to Gesso Dry Embossing:(Takes just 2/3 minutes!!!):


Aucun commentaire:
Enregistrer un commentaire